
Guest Author: Kaushil Kundalia (kaushil.kundalia@gmail.com)
Prerequisites:
- Slack workspace with admin privileges
- Ngrok installed
- Install all the requirements
- Basic understanding of Flask
- Create a Graphlit project
Source Code: The code for this tutorial can be found here on GitHub.
Step 1: Setting up your backend
Creating a Flask Server
To build a Slack bot, we will have a backend server that will receive events (aka messages) from Slack, process the event (by calling Graphlit APIs) and respond back by sending a message on Slack. We will use Flask, and Python to build our backend server. Let’s first create a basic Flask server:
from flask import Flask, request, jsonify

flask_app = Flask(__name__)

@flask_app.route("/slack-incoming", methods=["POST"])
def slack_challenge():
   event_data = request.json
   if "challenge" in event_data:
       # Verification challenge to confirm the endpoint
       return jsonify({'challenge': event_data['challenge']})

if __name__ == "__main__":
   flask_app.run(port=5000, debug=True)
Let us break this down. We define a route /slack-incoming that listens for POST requests. This route is intended to handle incoming events from Slack. Later in the tutorial, we will tell Slack about this endpoint and it will hit this endpoint with an HTTP POST request whenever it receives a new event.
But before that, we need to make sure our endpoint is verifiable by Slack. Slack sends a verification token (challenge) to the specified endpoint to confirm that the server is prepared to receive events.
In the provided code, when our Flask application receives a POST request with this challenge token, it simply reads the token from the incoming JSON payload and responds back with the same token encapsulated in a JSON response, thereby verifying the endpoint's authenticity to Slack.
We can start our server by simply running this as a Python script:
python3 app.py
Exposing it to the outside world
Since this is a locally hosted app, our backend service will not be able to communicate with the outside world. To solve this, we create a secure tunnel from the public internet to a local server running on your machine using a tool called ngrok.
Since our Flask server is running on port 5000, we run:
ngrok https 5000
Here, ngrok exposes your local Flask server to the internet by providing a publicly accessible URL. This URL can then be used to configure Slack's Event Subscriptions, allowing Slack to send event notifications, such as new messages, to your /slack-incoming endpoint.
Now that our backend is ready, we move over to the next step of setting up our Slack App.
Step 2: Setting up Slack App
Creating a Slack App
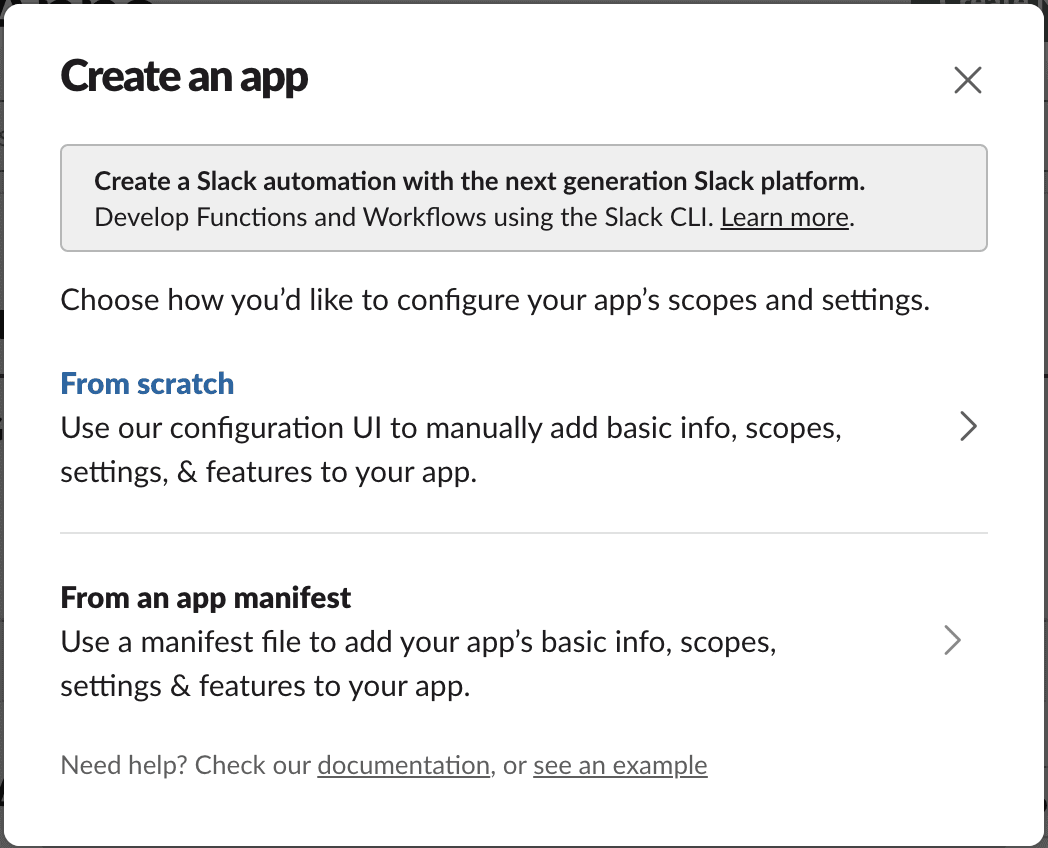
Our first step is to create a Slack bot. To do this, head over to Slack API and click on “Create New App”.

And now select “From Scratch”:
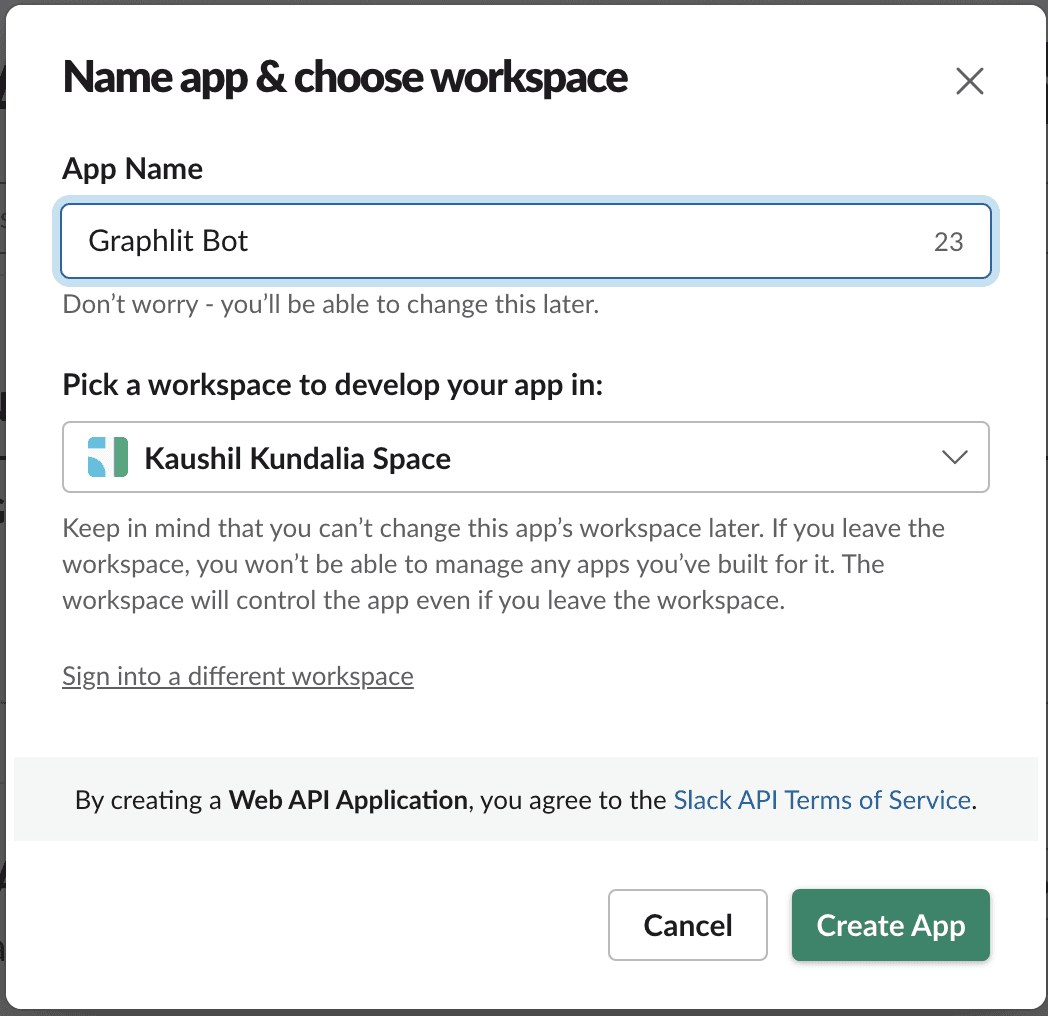
Enter your app’s name (which is “Graphlit Bot” here) and select a workspace. Hit “Create App”:
Permissions
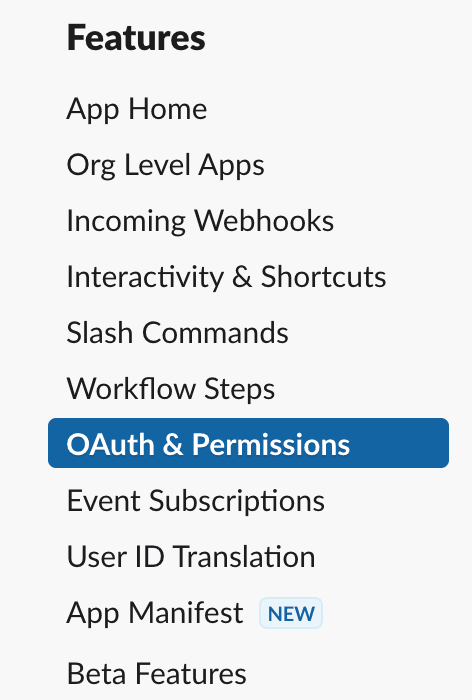
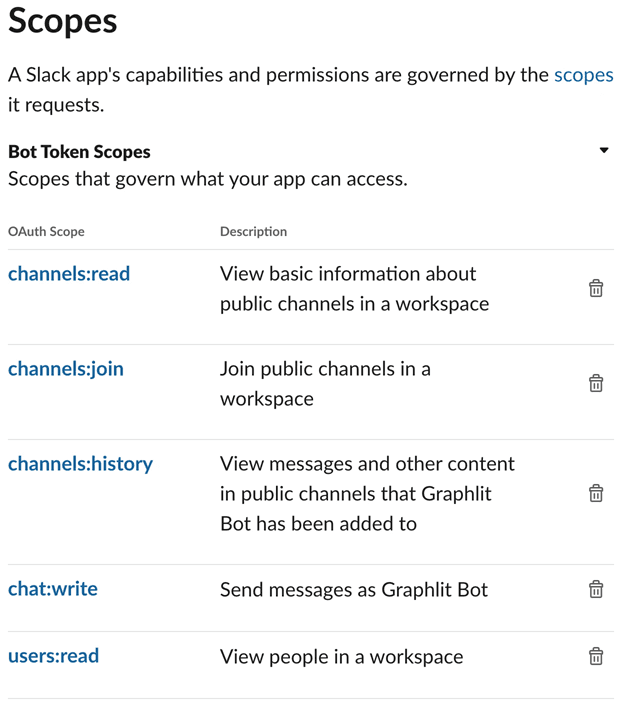
Next step is to grant permission that will allow our Graphlit powered app to communicate with Slack via our newly created app. Head over to “OAuth and Permissions”, and add the following “Bot Token Scopes”:
Enabling Events
Next step is to tell Slack about the endpoint on which it will make a POST request whenever an event occurs. Here, we will use the URL that Ngrok created. First turn on the Event Subscriptions and paste the URL (make sure you include the /slack-incoming endpoint).
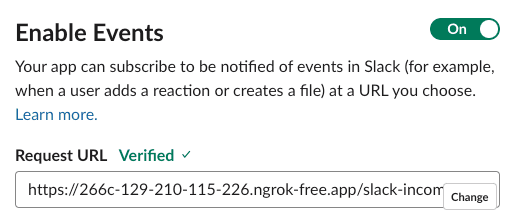
Once the URL is verified, will subscribe to new messages coming in a channel. To do this, subscribe to the message.channels event.
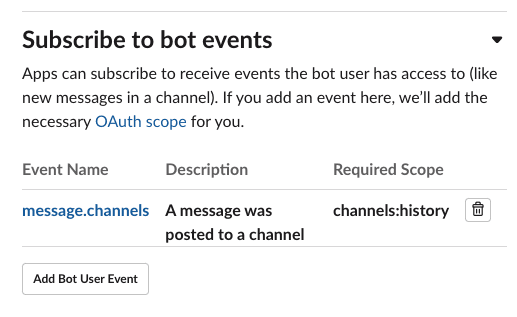
Hit “Save Changes”
This finishes the Slack App setup. Now we will install the app to our workspace.
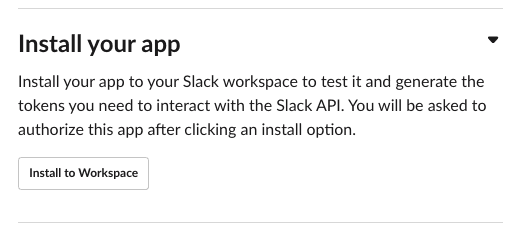
Installing to Slack Workspace
Navigate to “Basic Information” section and click on “Install your app”.
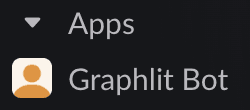
Once the installation is complete you should be able to see “Graphlit Bot” under “Your apps” section on Slack.
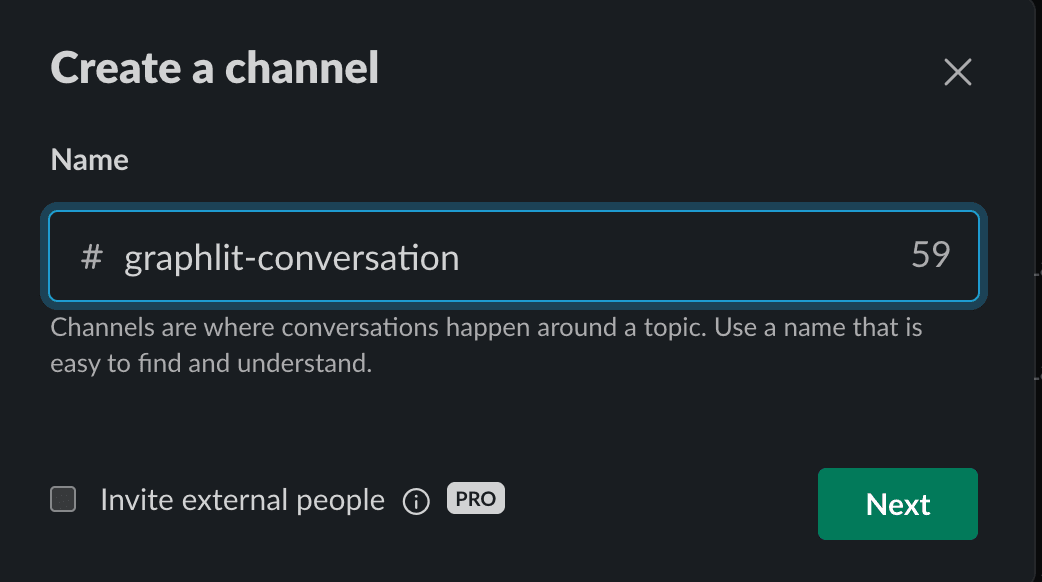
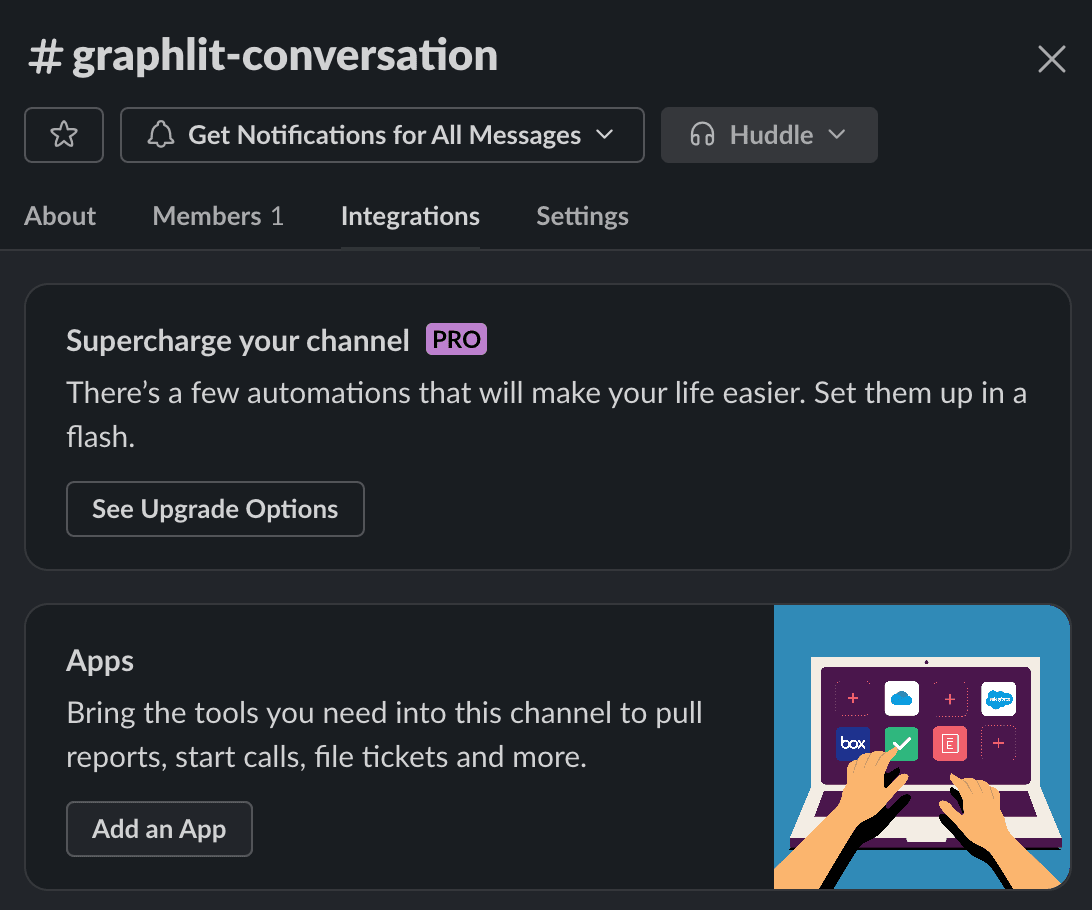
Creating Slack Channel
Finally, let’s create a new channel on Slack and add our bot to it. We will use this channel to run our conversational bot. Here I’ve created a new channel named #graphlit-conversation and add Graphlit Bot.
Voila!! This concludes our Slack setup. Now let’s dive into the interesting part.
Step 3: Getting started with Graphlit
Getting started with Graphlit is straightforward and easy. Let’s start by creating a new project.
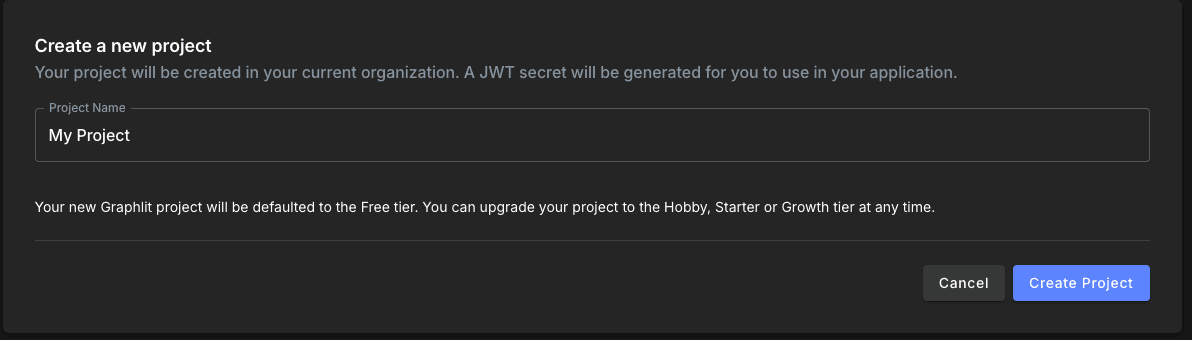
Creating Project on Graphlit
Head over to the Graphlit Developer Portal and create a new project. You can read more information about creating a project here.
We are naming our project “My Project”.
Once you create a project, Graphlit provides an API endpoint on which you can make GraphQL queries. Graphlit provides an API that does all the heavy lifting work behind building an LLM application.
This means that as a developer, you do not need to worry about managing vector databases, generating embeddings, integrating with external data sources, building wrappers over LLM models, etc--Graphlit abstracts away all this.
That’s all the setup you need to get started with Graphlit. Let’s start building our chatbot.
Ingesting Slack messages as Feed
A feed in Graphlit allows you to ingest bulk contents into your Graphlit Project. Feed supports ingestion of multiple types of data such as PDFs, messages, images, audios, videos, and even RSS or Reddit posts. Here we will be using the Slack Feed to ingest messages from Slack into our project, and we will schedule our feel to pull new messages from Slack every minute. We will use this content to create a conversation over it in the subsequent step. But for now, let’s focus on how to create a feed.
Content in Graphlit is referred to as any form of complex or unstructured data such as PDFs, images, Slack messages, Word documents etc.
We will use the createFeed mutation via the API Explorer. API Explorer provides an in-browser IDE within your Graphlit project that you can use to run your GraphQL queries or mutations.
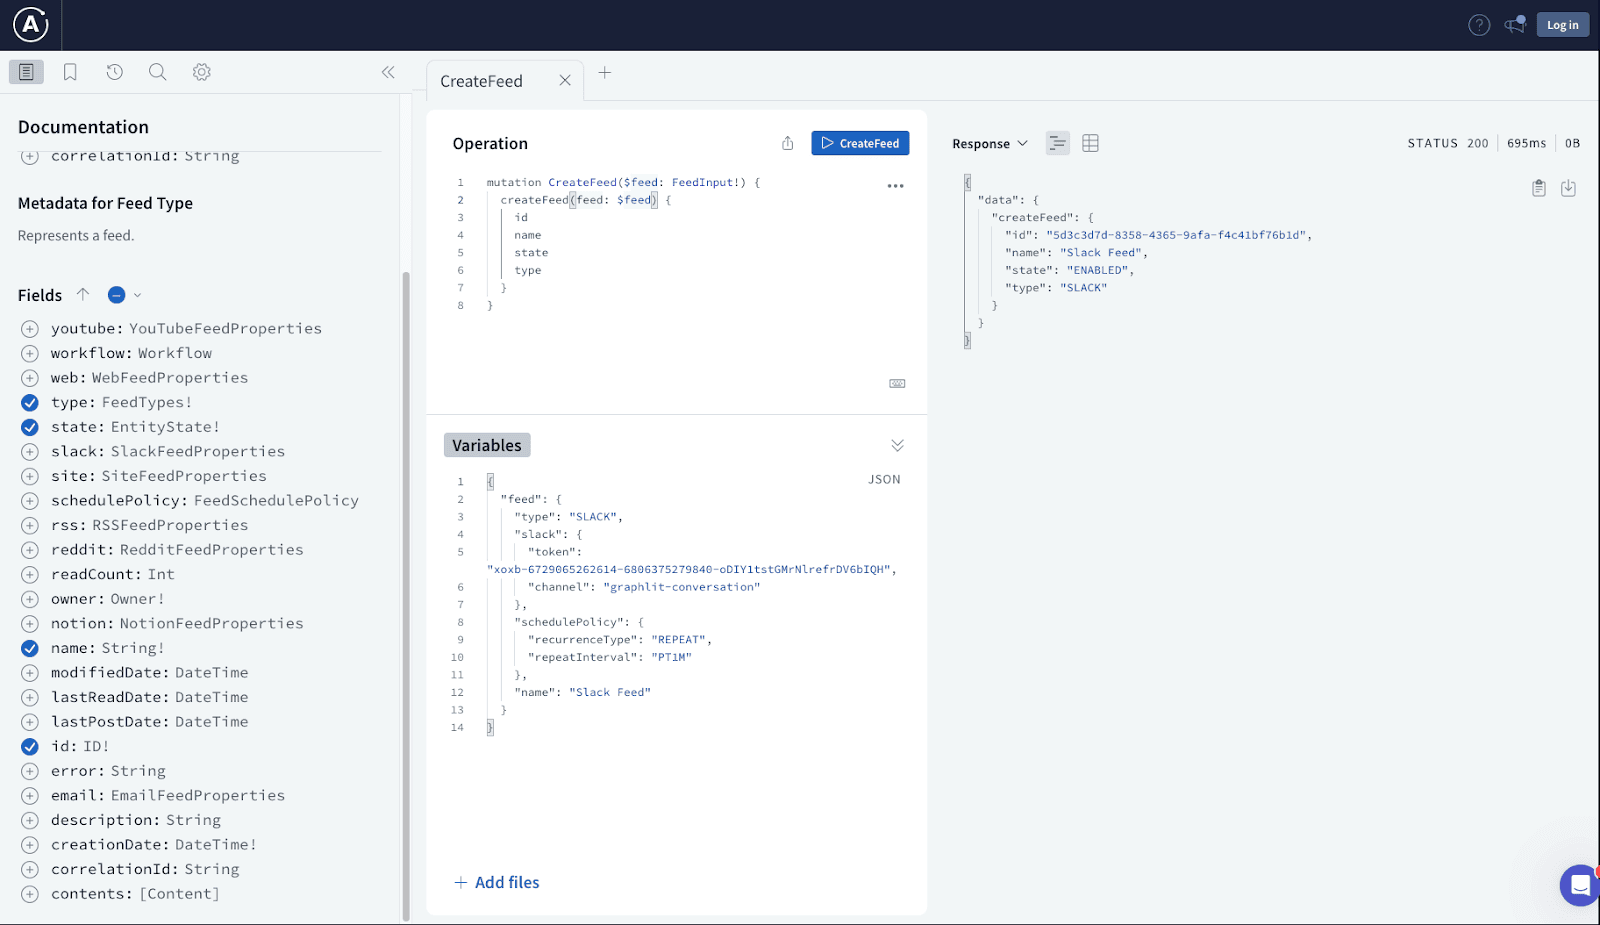
Request
mutation CreateFeed($feed: FeedInput!) {
 createFeed(feed: $feed) {
   id
   name
   state
   type
 }
}
Variables
{
 "feed": {
   "type": "SLACK",
   "slack": {
     "token": "xoxb-your-token",
     "channel": "graphlit-conversation"
   },
   "schedulePolicy": {
     "recurrenceType": "REPEAT",
     "repeatInterval": "PT1M"
   },
   "name": "Slack Feed"
 }
}
Response
{
 "data": {
   "createFeed": {
     "id": "5d3c3d7d-8358-4365-9afa-f4c41bf76b1d",
     "name": "Slack Feed",
     "state": "ENABLED",
     "type": "SLACK"
   }
 }
}
Let us jump over to Slack to see our feed work in action.

Request
query Feed($feedId: ID!) {
 feed(id: $feedId) {
   name
   contents {
     text
   }
   slack {
     channel
   }
 }
}
Variables
{
 "feedId": "55974d0f-32dd-4e65-b0d1-2878b178ea28"
}
Response
{
  "data": {
    "feed": {
      "name": "Slack Feed",
      "contents": [
        {
          "text": "Slack Message:\n- From: Kaushil Kundalia\n- Created at 3/24/2024 5:39:21 AM UTC\nHello. This is the first message that the Slack Feed will read."
        }
],
      "slack": {
        "channel": "graphlit-conversation"
      }
    }
  }
}
Perfect, now that we have data coming in, we will use this to build our conversational chatbot.
Creating Conversation
Conversation on Graphlit is a data model that lets you build chatbot based applications.
Internally a conversation does the following:
- When you ingest content, Graphlit will internally create a knowledge graph on it.
- A conversation will be across content, based on the optional filter provided with the CreateConversation mutation. If no filter is provided, the conversation will be across all content in your project. It will then use the knowledge graph that makes it easy to converse about the filtered content.
- You can prompt a conversation; i.e. you can give a message to a conversation and it will search for relevant content from the knowledge graph, parse it to an LLM & generate a response.
- Each time you prompt a conversation, it will add 2 new messages to its knowledge graph (the user message and assistant message) which updates your context.
- You can continue a conversation by specifying a conversation id.
Hence using Conversation abstracts away the process of generating vector embeddings, storing to a vector database, running similarity search, etc.
To create a conversation you can run the createConversation mutation. Graphlit will use Azure OpenAI GPT-3.5 Turbo 16k by default to complete the conversation prompts. But you optionally provide a Specification when creating the conversation and select any model from OpenAI, Anthropic, Mistral etc. Notice that we’re using a feeds filter here. This tells Graphlit on what content to converse over, i.e. the Slack feed.
Request
mutation CreateConversation($conversation: ConversationInput!) {
 createConversation(conversation: $conversation) {
   owner {
     id
   }
   name
   id
 }
}
Variables
{
  "conversation": {
    "name": "Slack Conversation",
    "filter": {
      "feeds": [{
          "id": "55974d0f-32dd-4e65-b0d1-2878b178ea28"
        }
      ]
    }
  }
}
Response
{
  "data": {
    "createConversation": {
      "owner": {
        "id": "3e6e8313-421c-4dc6-b50d-c6e3c81ff2b3"
      },
      "name": "Slack Conversation",
      "id": "354f7085-3505-4481-a3b4-f2008c08df11"
    }
  }
}
Again, we will use the API Explorer to create a conversation and then prompt over that conversation by making calls using Python.
Note the conversation ID as it will be used later.
Step 4: Bringing it all together
Let us recap what we did so far:
- Created a Python backend that can receive slack messages
- Created a Slack Bot and added it to a channel
- Created a Conversation on Graphlit that we will use to build the chatbot
Now let’s glue it all together in our backend.
Reading environment variables
Create a file .env and provide the following variables:
SLACK_BOT_TOKEN="REDACTED"
SLACK_CHANNEL="graphlit-conversation"
SLACK_SIGNING_SECRET="REDACTED"
SLACK_BOT_USER="Graphlit Bot"
GRAPHLIT_ORG_ID="REDACTED"
GRAPHLIT_ENV_ID="REDACTED"
GRAPHLIT_SECRET_KEY="REDACTED”
GRAPHLIT_URL="https://data-scus.graphlit.io/api/v1/graphql"
GRAPHLIT_CONVERSATION_ID="REDACTED"
Import these in the Flask application app.py.
from dotenv import load_dotenv

load_dotenv()

slack_token = os.getenv("SLACK_BOT_TOKEN")
slack_channel = os.getenv("SLACK_CHANNEL")
signing_secret = os.getenv("SLACK_SIGNING_SECRET")
slack_bot_user = os.getenv("SLACK_BOT_USER")
graphlit_organization_id = os.getenv("GRAPHLIT_ORG_ID")
graphlit_environment_id = os.getenv("GRAPHLIT_ENV_ID")
graphlit_secret_key = os.getenv("GRAPHLIT_SECRET_KEY")
graphlit_url = os.getenv("GRAPHLIT_URL")
graphlit_conversation_id = os.getenv("GRAPHLIT_CONVERSATION_ID")
Authenticating Graphlit API
Graphlit uses JWT based authentication for its API. To create a JWT, you can add the following function in app.py.
def get_graphlit_token(organization_id,
                      environment_id, secret_key, issuer="graphlit", audience="https://portal.graphlit.io",
                      role = "Owner", expiration_hours = 1) -> str:
   expiration = datetime.datetime.utcnow() + datetime.timedelta(hours=expiration_hours)

   # Define the payload
   payload = {
       "https://graphlit.io/jwt/claims": {
           "x-graphlit-environment-id": environment_id,
           "x-graphlit-organization-id": organization_id,
           "x-graphlit-role": role,
       },
       "exp": expiration,
       "iss": issuer,
       "aud": audience,
   }

   # Sign the JWT
   token = jwt.encode(payload, secret_key, algorithm="HS256")
   # verify the token
   try:
       decoded = jwt.decode(token, secret_key, algorithms=["HS256"], audience=audience)
       print(decoded)
   except jwt.ExpiredSignatureError as ex:
       print("Error: Token has expired")
       raise ex
   except jwt.InvalidTokenError as ex:
       print("Error: Invalid token")
       raise ex
   return token
This function returns an HS256 encoded token string, and this token will be passed in the header while making any request to the Graphlit APIs.
Using PromptConversation API
The PromptConversation API facilitates the creation and management of conversational chatbots. PromptConversation API expects a user prompt and returns with essential details, including the LLM response, conversation ID, messages count etc.
Upon receiving a request, the API will fetch relevant data by performing a similarity search on content and past conversation, and generate a response through LLM by using the fetched data. Besides, it will also store the user prompt and the LLM response in embeddings which can be queried upon by future prompts.
Here, we will use gql which is a Python GraphQL client. We wrap calls to Graphlit inside graphlit_request function, that will take a user prompt str as an input, call the PromptConversation API and return the LLM response as a string.
token = get_graphlit_token(graphlit_organization_id, graphlit_environment_id, graphlit_secret_key)
transport = RequestsHTTPTransport(url=graphlit_url, headers={"Authorization": f"Bearer {token}"})
gql_client = Client(transport=transport)

def graphlit_request(prompt: str) -> dict:
   query = gql(
       """
       mutation PromptConversation($prompt: String!, $promptConversationId: ID) {
       promptConversation(prompt: $prompt, id: $promptConversationId) {
           message {
           message
           }
           messageCount
           conversation {
           id
           }
       }
       }
       """
   )

   variables = {
       "prompt": prompt,
       "promptConversationId": graphlit_conversation_id
   }

   return gql_client.execute(query, variable_values=variables)
Breaking this down:
-
We fetch Graphlit tokens by calling
get_graphlit_token, and then use it to initialize a GraphQL Client. -
Query and Variables:
- As seen in the query, the PromptConversation mutation expects 2 arguments ($prompt: String!, $promptConversationId: ID). The $prompt would be the user message coming from Slack and the $promptConversationId is the conversationId received as a response after we created a conversation. Optionally you can also query Conversations.
- And the API will respond with the following fields mentioned in the mutation.
{
  message {
    message
  }
  messageCount
  conversation {
    id
  }
}
-
Payload and Request: We wrap the query and variables inside payload and execute the query.
- Response: A sample Graphlit API response in this case would look like this
{
  "promptConversation": {
    "message": {
      "message": "This is LLM Response"
    },
    "messageCount": 16,

    "conversation": {
      "id": "5363a7ea-bf63-477a-b625-84f9ec9d9e2b"
    }
  }
}
- We will extract the LLM response message from the query response in Flask function:
             response = graphlit_request(text)
             message = response.get("promptConversation").get("message").get("message")
             print(message)
Bringing it all together
Now that our backend is able to authenticate and call the Graphlit API we can now connect it with our slack_challenge() function to handle incoming messages. Modify the function in app.py as given below:
@flask_app.route("/slack-incoming", methods=["POST"])
def slack_challenge():
   event_data = request.json
   slack_user_id = slack_client.api_call("auth.test")["user_id"]
   if "challenge" in event_data:
       # Verification challenge to confirm the endpoint
       return jsonify({'challenge': event_data['challenge']})
   elif "event" in event_data:
       event = event_data['event']
       print(f'event type got it: {event.get("type")}')

       # Handle message events
       if event.get("type") == "message" and "subtype" not in event:
           # Process the message
           user = event["user"]
           text = event["text"]
           try:
               response = graphlit_request(text)
               message = response.get("promptConversation").get("message").get("message")
               print(message)
           except Exception as ex:
               # if something goes wrong, respond accordingly.
               message = "I'm sorry something went wrong internally. Please try again."

           # Send the response to Slack
           slack_client.chat_postMessage(channel=slack_channel, text=message) if user !=  slack_user_id else None
   return "OK", 200
The code checks if the incoming payload contains an "event" key, signifying an event notification from Slack. Specifically, for message events without subtypes (i.e., standard messages, not updates or deletions). We extract user and text from the message and pass the text to the graphlit_request to get a response. The response from this operation is then conditionally posted back into the Slack channel, provided the message wasn't sent by the bot itself (thereby preventing the bot from responding to its own messages).
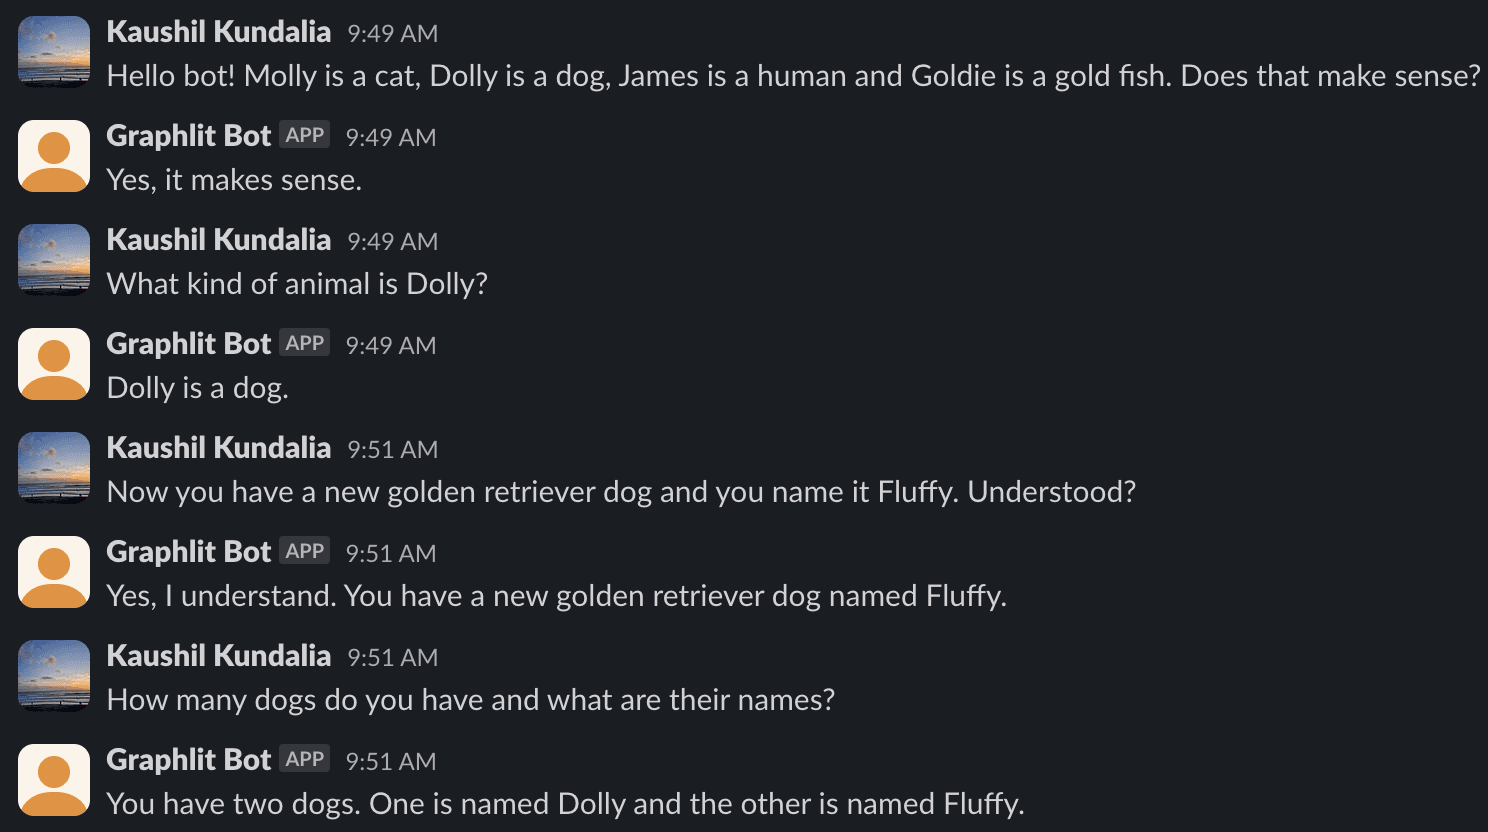
Result
And there we have it!!! Let’s head over to Slack and see the symphony in action.
We now have a production ready Slack bot that can listen to, remember and respond to conversation messages.
Summary
Please email any questions on this tutorial or the Graphlit Platform to questions@graphlit.com.
For more information, you can read our Graphlit Documentation, visit our marketing site, or join our Discord community.